Unreal Engine Plug 'n' Play SDK Docs
Installing the Charisma Unreal Plug ‘n’ Play SDK
Project setup
This page contains everything you need to get your Charisma-powered project up and running in Unreal Engine!
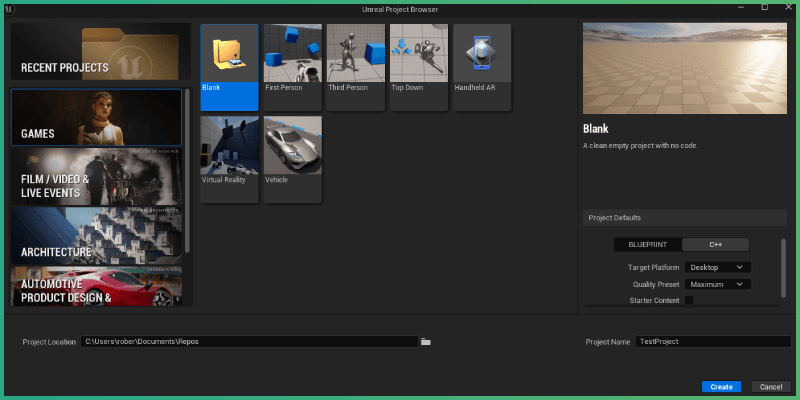
First, open up Unreal Engine, and create a blank Unreal Engine C++ project. Run the project to compile it.
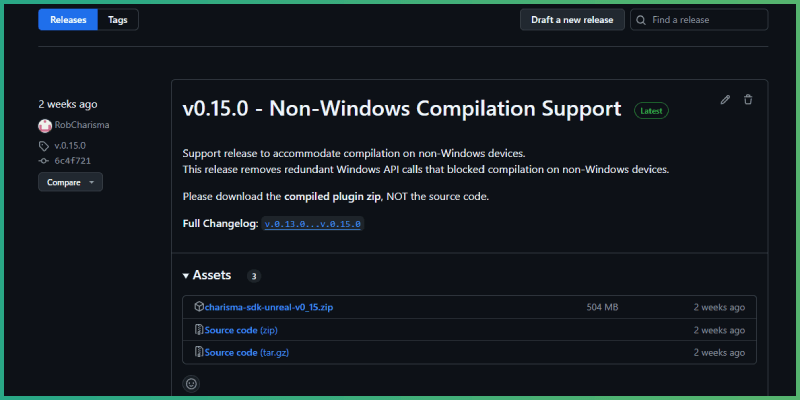
Then, you'll need to download both the Charisma Unreal SDK and the Charisma Unreal Plug 'n' Play SDK from GitHub via the links below:
Charisma Unreal Engine SDK (opens in a new tab)
Charisma Unreal Engine Plug 'n' Play SDK (opens in a new tab)
Please download the latest releases of both packages. Follow the release instructions.
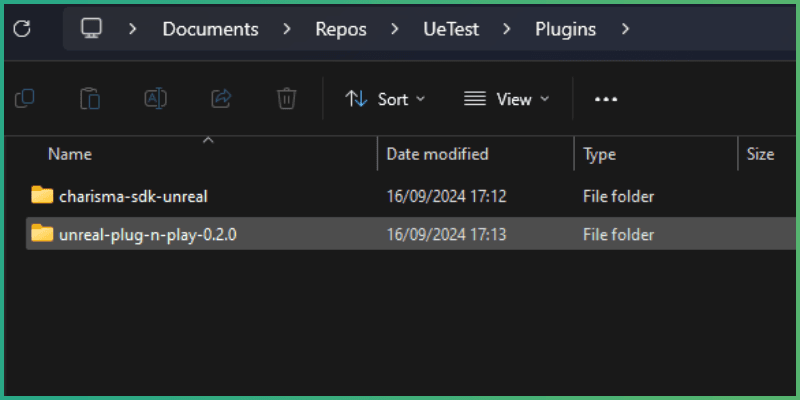
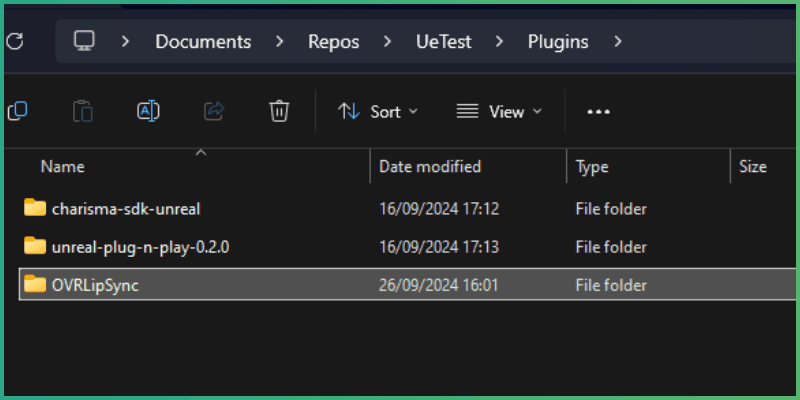
Once downloaded, switch Unreal Engine off. Then, go into your project root folder, and create a new folder called Plugins. Then, extract contents of downloaded plugins, into the Plugins folder.
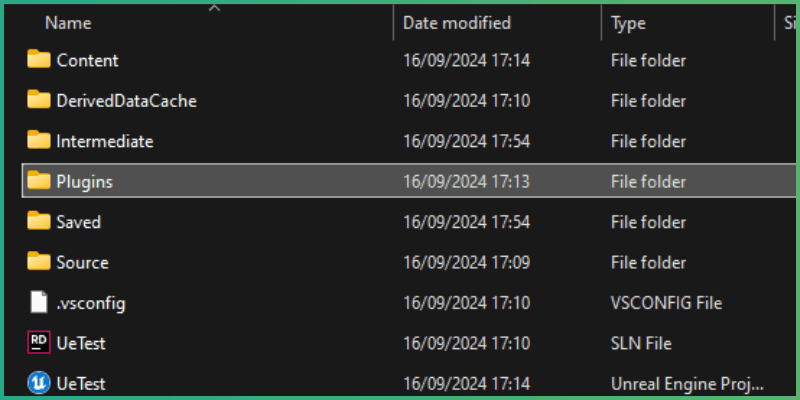
Then, right click on your PROJECTNAME.uproject file, and select Generate Visual Studio Project Files
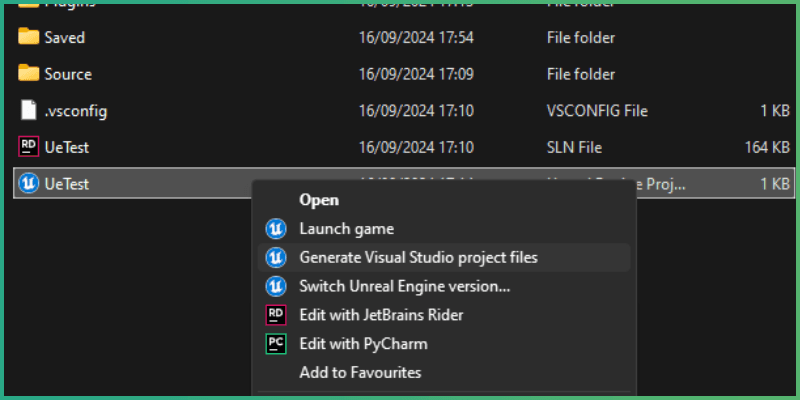
Once that's done, the plugins are installed! You should now be able to open the project in Unreal Engine.
NOTE: Depending on Unreal Engine version, or SDK version, the compilation can fail when running the project in Unreal Engine. In that case, refer to the troubleshooting sections in our Unreal Engine GitHub repos, or try opening up your IDE of choice and solving the compilation problems there - the fixes are usually straightforward. The plugins are imported directly into UE, meaning that any problems in the source code can be fixed directly.
Connecting your Unreal project to your Charisma story
Charisma story setup
First, create your Charisma story. You will need to login to your Charisma account, and go to the Stories page.

Then, create a "Pro Story", and choose "Plug 'n' Play" as the template for the story.

The sample project contains a basic story with two characters, and works out-of-the-box with our Plug 'n' Play SDKs, so you can get started in learning the Charisma ecosystem.

Engine connection to Charisma
Now, let's go back to Unreal Engine. Let's navigate to the Plug 'n' Play example level. This can be found in the Content Browser in:
All > Plugins > CharismaPlugNPlayContent > Levels > PlugNPlay
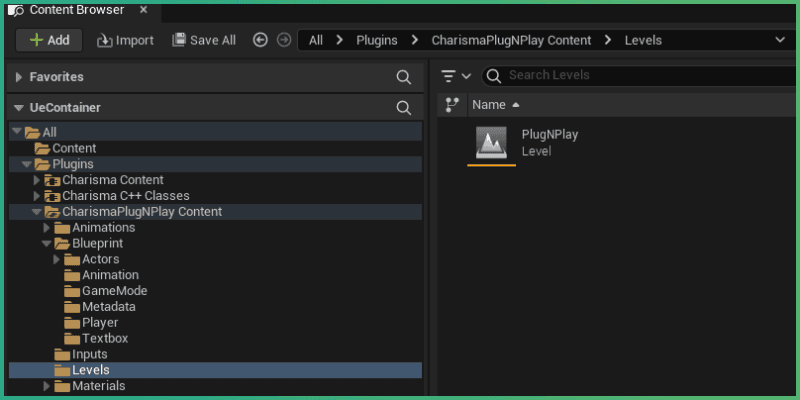
Now you are viewing the example scene. You can look around and see all the different Charisma entities in the Outliner.
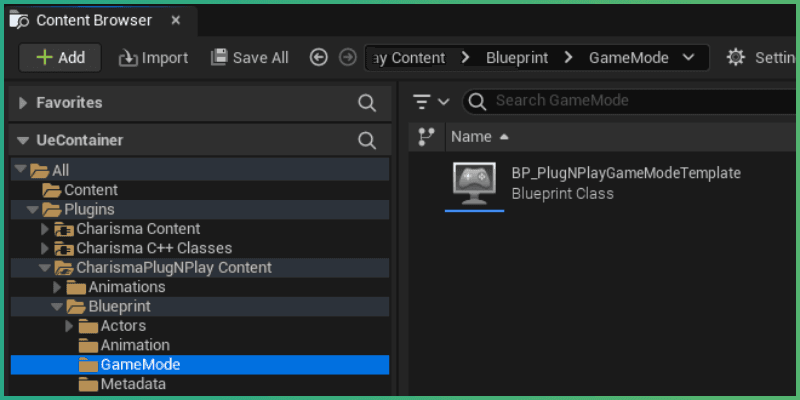
To connect to your Charisma story, you will need to type in the story parameters in the Game Mode for the level. This can be found in:
All > Plugins > CharismaPlugNPlayContent > Blueprints > Game Mode > BP_PlugNPlayGameModeTemplate
Once the Game Mode is open, select Class Defaults at the top toolbar, and take a look at the Details panel on the right side of the screen. Look for a section called Charisma. In this section, you will find Connection Params - these are the values that you will need to populate in order to connect the SDK to the Charisma story.
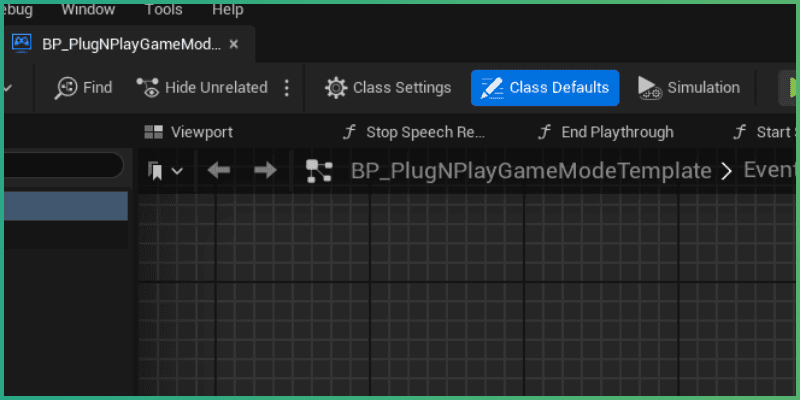
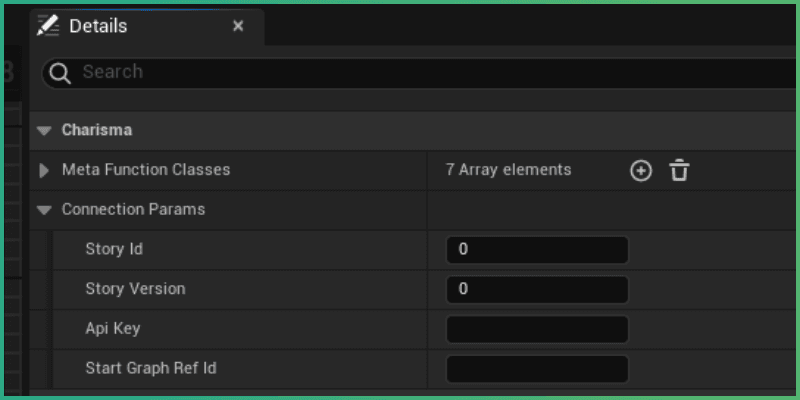
To connect, we will need 4 values: StoryID, StoryVersion, ApiKey, StartGraphReferenceId. Let's go back to the Charisma story page on your web browser to find these values.
StoryID & ApiKey
These are the values that link your Unreal Engine SDK to the correct story on the Charisma server.
StoryID and ApiKey can be found on the Story Overview page of your story, if you scroll down to the "Play API Access" section.
Click "Generate Key", to generate the API key.
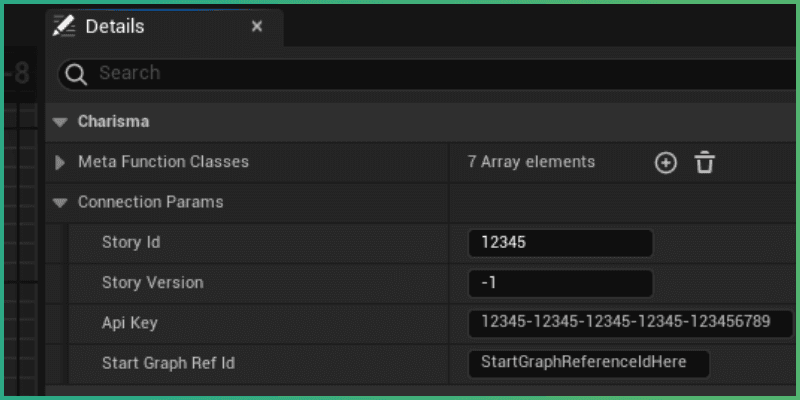
Then, you can copy the StoryID, and API key, and paste them into the matching fields in the BP_PlugNPlayGameModeTemplate game mode in Unreal.

StartGraphReferenceID
This is the value that informs Charisma from which graph you want your Charisma story to be started from.
In our case, click on the three dots on the "Start Subplot" on the left toolbar, and then click "Edit Details".
In the popup that appears, copy the "Reference ID" value, and paste it into the matching field in Unreal.

StoryVersion
StoryVersion is the value that informs Charisma as to which version of the story you want to play.
In Unreal Engine, set this value to -1. This means you want to play the unpublished, current draft version of your story.
Later on, when your story is published, you can set this to 0 to point Charisma at the current published version of your story, or a value greater than 0 to point at a specific version of the story instead.
Test the connection to Charisma
If everything was set up correctly, you can now play the test story in your Unreal Engine editor.
Give it a try - run the game in Play mode and see your template story come to life!
In the next tutorial sections, you will learn how to modify various aspects of the Plug 'n' Play SDK with custom content.
Linking your Charisma character to a 3D character model
Creating new characters in Charisma
Our Plug 'n' Play SDK comes with a story with 2 characters in the scene by default.
To add a new character, begin by adding a new character on the Charisma story. Go to "Characters", and "Add new Character"

Give the character a unique name, select a voice, and Save.
Once you have created a character, give them some dialogue on the graph (Start Subplot in the case of Plug 'n' Play template).

Creating new characters in engine
Now, switch over to Unreal Engine. Our Plug 'n' Play sample comes with 6 character models ready to use. These can be found in:
All > Plugins > CharismaPlugNPlay Content > Blueprint > Actors
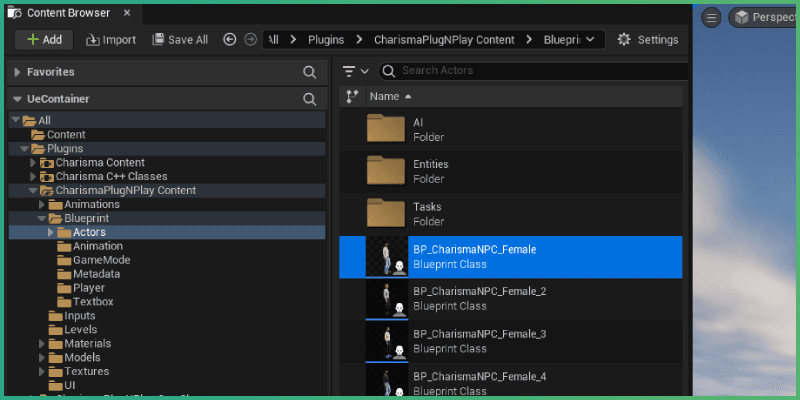
Drag one of the characters into the level.
To link the 3D model to your Charisma character, click on your newly added character instance, and navigate over to the Details. Then, scroll down in the component list, and select CharismaPnPActor component.
Once selected, expand the Charisma > EntityComponent section, and fill in the EntityId field to match the character name you have made in your Charisma story.
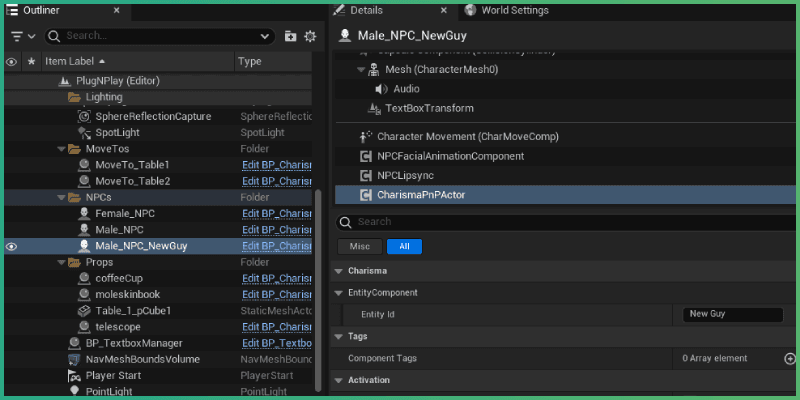
Now, your 3D model is linked to the character in your Charisma story, and they will speak during a playthrough when relevant Character nodes are hit in the graph.
Character animations and default behaviour
Default animation behaviour
The Plug 'n' Play SDK includes a full animation logic system for the provided character models, and a suite of base layer, full body, head, and upper body animations for each model. Blinking and facial expressions are also handled by the animation system.
Animations are split into 6 key groups:
-
Idle: Animations played when character is idle (not talking, walking, or performing a custom animation/mannerism0
-
Mannerism: Animations that can play intermittently during the idle state
-
Walking: Animations that play when a character is walking
-
Turning: Animations that play when a character is turning
-
Talking: Animations that play when a character is talking
These animations are automatically governed by the animation system, and appropriate animation plays when a character is performing different actions.
Let's take a look at the basics of the animation system. Open up an animation blueprint, which can be found in:
All > Plugins > CharismaPlugNPlayContent > Animations > ABP_NPCFemale
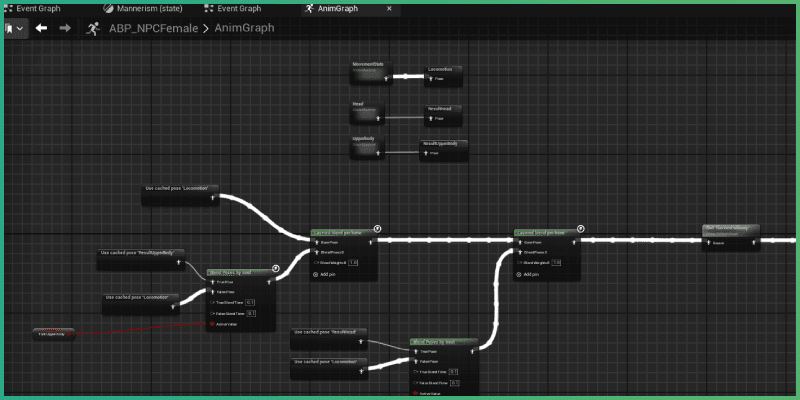
Here you can see the three different poses that are being created using the animation state machines.
-
The MovementState/Locomotion pose handles the full body animations that include the walking and standing still animations (idles, mannerisms, turning and talking).
-
The Head pose handles talking animations, as well as head tracking.
-
The UpperBody pose is mainly reserved for talking animations, where parts of the upper body move around as the character speaks.
These animations get blended together based on several conditions, and are then outputted onto the 3D model.
Character facial expressions
Default facial expression behaviour
Facial expressions in the Plug 'n' Play are controlled through the Charisma Emotions system. You can apply emotions in Character node (opens in a new tab) in the Charisma graph. These will then reflect in the charater's face on the SDK side.

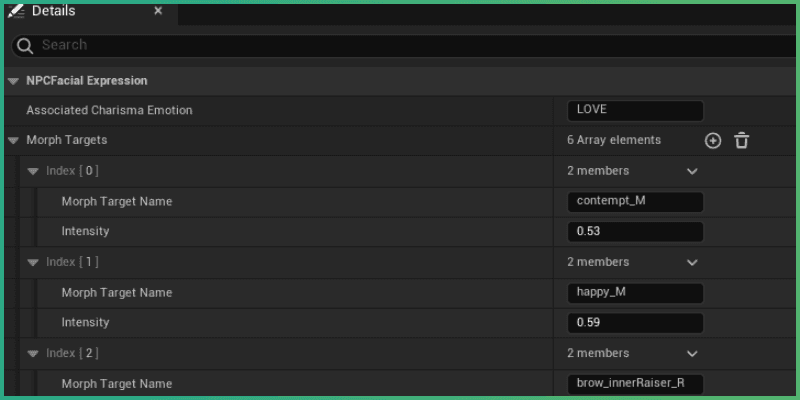
Each expression has an associated data asset with a list of morph target configurations that get applied onto the character's face when an emotion is received from Charisma. These emotion data assets can be found in:
All > Plugins > CharismaPlugNPlayContent > Animations > Data > FacialExpressions

Each emotion has an AssociatedCharismaEmotion, which qualifies the emotions to trigger when relevant emotion from Charisma is applied. Then, there is the Morph Target list, which is a list of 'blendshapes' on a charater's face when the emotion is applied.
You can modify or create your own facial expressions. Let's take a look at modifying an existing expression.
Adding a new facial expression
Navigate to the root character animation blueprint, which can be found in: All > Plugins > CharismaPlugNPlayContent > Animations > ABP_NPCFemale
Once inside, navitgate to the skeletal mesh modification panel, and open up the Morph Target Panel:
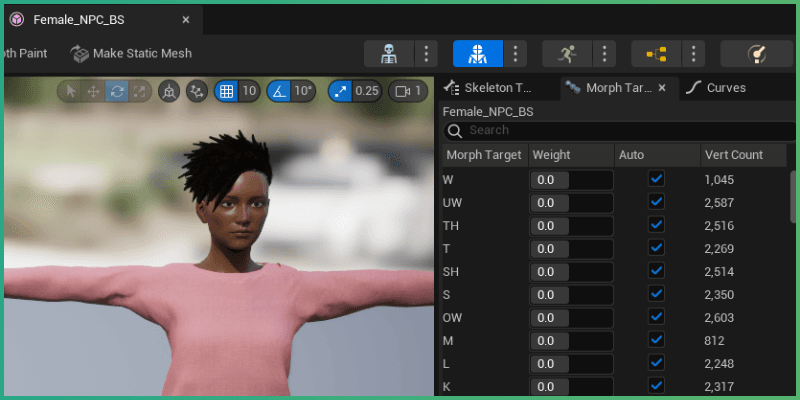
In the Morph Target Panel you can change the weight of the different blendshapes. This will morph different part's of the character's face. Try it out for yourself!
Once you're happy with the expression you've created, you can use the adjusted weights as a reference for your new facial expression data asset.
Navigate back to All > Plugins > CharismaPlugNPlayContent > Animations > Data > FacialExpressions.
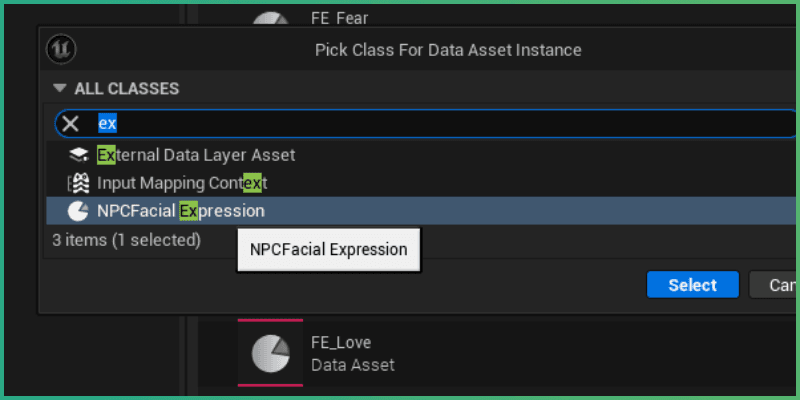
Then, right click and create a new Data Asset, by navigating through Miscellaneous > Data Asset, and select NPCFacialExpression for type of the Data Asset. Give your new data asset a unique name.
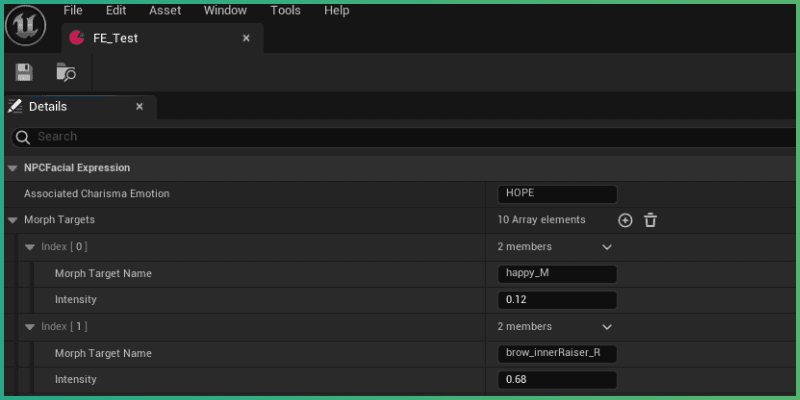
Then, open up your newly created asset, and set Associated Charisma Emotion to a matching Charisma graph emotion you want your facial expression to trigger with.
After that, populate the Morph Target list with matching names/weights you've set in the ABP_NPCFemale blueprint.
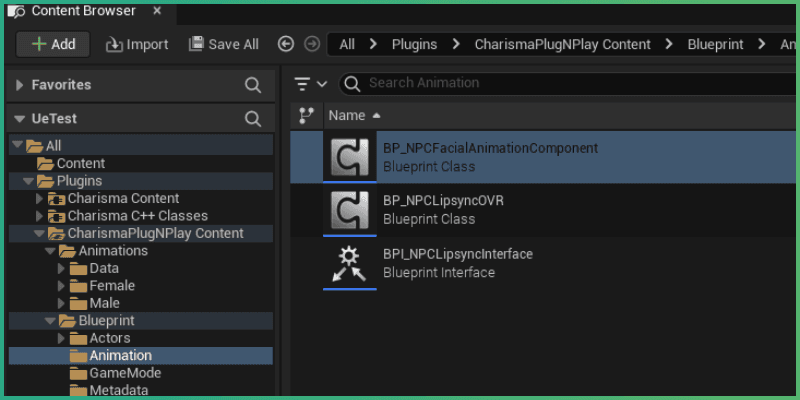
Now, we just need to make sure that the SDK can parse this asset. Go to All > Plugins > CharismaPlugNPlayContent > Blueprint > Animation > BP_NPCFacialAnimationComponent, and open it up.
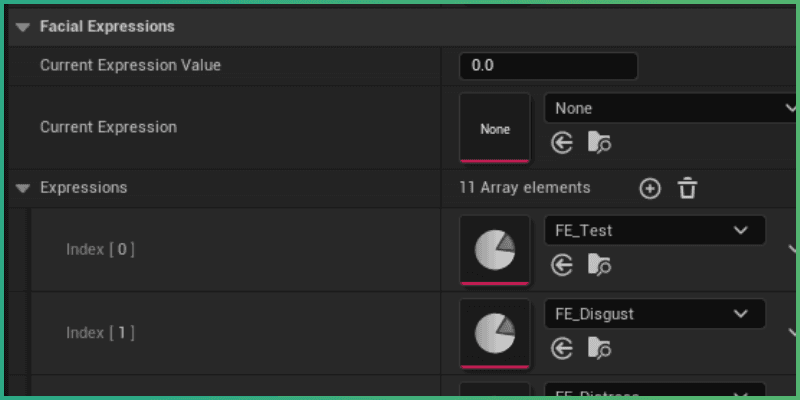
Inside of the blueprint, click on Class Defaults, and in Details panel, look for Facial Expressions sections. Under one of them, you will find an Expressions list. Expand the list, and add your new expression into the list. Save, compile the blueprint, and your facial expression is ready to go!
Because BP_NPCFacialAnimationComponent is present on both the male and female NPC models, your new expression will now automatically appear on all NPCs in your project when the Associated Charisma Emotion is detected.
You can apply an Emotion to a Character, on the Character node (opens in a new tab) in Charisma. Apply an emotion to a specified character, with some intensity, and run the game to see how their facial expressions are affected.

Lipsync
Oculus lipsync support
Charisma Plug 'n' Play includes support for Oculus VR Lipsync. To get started, download the official Oculus Lipsync OVR package from the official website:
Oculus Lipsync for Unreal Engine (opens in a new tab)
Once downloaded, turn off Unreal Engine, unzip the the folder, and move the extracted plugin into your project folder, under ROOT > Plugins
Then, right click on your PROJECTNAME.uproject file, and select Generate Visual Studio Project Files
The plugin is now imported into your project.
NOTE: Because Oculus no longer updates the plugin, and Unreal Engine keeps getting upgrades, the plugin may need an update in the source code, depending on your Unreal Engine version. For upgrading the plugin and fixing the compiler issues, check out our upgrade guide on GitHub by clicking on this link. (opens in a new tab)
Oculus lipsync setup in engine
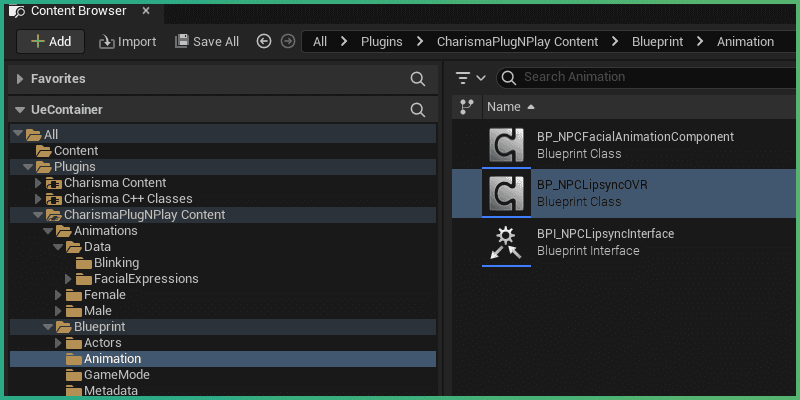
The NPCs in the Plug 'n' Play come with lipsync handling components attached out-of-the-box. The 2 main components for this can be found in:
All > Plugins > CharismaPlugNPlayContent > Blueprint > Animation
-
BPI_NPCLipsyncInterfaceis the interface that you can override in order to create your own lipsync functionality. The interface allows for receiving/modifying components that lipsync targets, like skeletal meshes, and also feeding the audio which should be analysed for purposes of lipsyncing. -
BP_NPCLipsyncOVRis a lipsync component that inherits fromBPI_NPCLipsyncInterface, and is already made to work with Oculus VR lipsync. This component is attached to all NPC characters by default.
BP_NPCLipsyncOVR is attached to characters by default. Once you have imported the lipsync plugin, the lipsync should work out-of-the-box.
NOTE: If Oculus lipsync is not installed, you will get blueprint compilation errors, but it does not affect playback of the game.
Setting ‘move-to’ behaviour
NPC Movement
You've learned how to play an animation using metadata in the previous section of the tutorial; now let's take a look at how you can make your characters move within the game world.
Firstly, you'll need to set up a "MoveTo" entity in your Unreal Engine project.
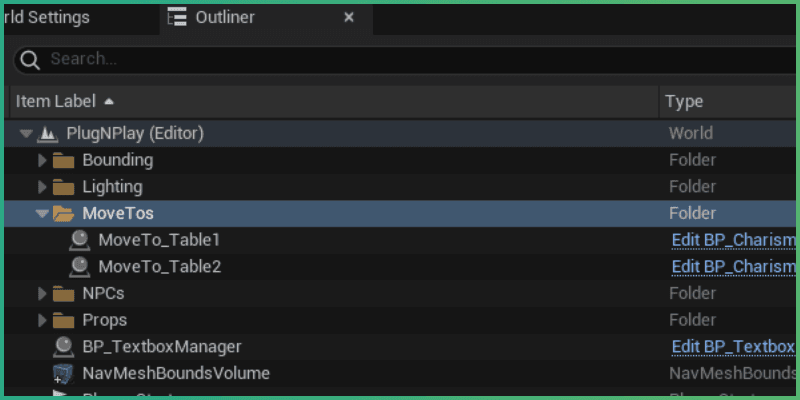
Go into your Plug 'n' Play sample scene, and take a look at the example NPC move points in the outliner Outliner > MoveTos > MoveTo_Table1 / MoveTo_Table2.
These 'Move Points' are empty objects at floor level, with a CharismaEntity script that has an EntityID. The EntityID is what you'll be sending through the graph to force the NPCs to walk to different locations.
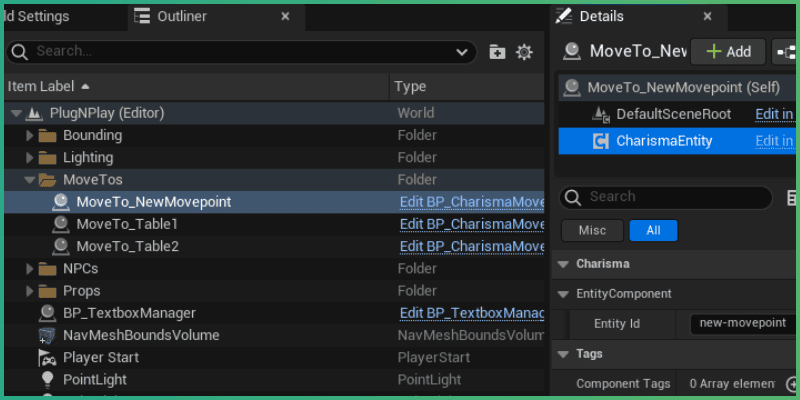
To create a new MoveTo object, find the MoveTo blueprint under All > Plugins > CharismaPlugNPlayContent > Blueprint > Actors > Entities > BP_CharismaMoveTo. Drag the object into the scene, and give it a unique Entity ID
Then, in your Charisma graph, go to a node where you want to force character movement, and go into Metadata Manager.
Add new metadata [move-to | ashby,X], where X is the EntityID you assigned to a move point in Unreal Engine.
| Key | Value | Function of Metadata |
|---|---|---|
| move-to | [character name], [move to target] | Makes specified character walk to target waypoint |

And that's it - your character should now walk to your new move point when you hit the character node with the metadata!
Setting ‘look-at’ behaviour
NPC look-at targeting
The Charisma SDK also includes a look-at metadata function, which allows you to control who or what your character is looking at from within the Charisma graph.
To make use of this functionality, simply add [set-look-at | ashby,X] metadata to a node, where X is a character or other "Charisma object" you want Ashby to look at (you can also change Ashby to a different character - this is just an example).
| Key | Value | Function of Metadata |
|---|---|---|
| set-look-at | [character name],[look at target] | Makes specified character look at a target for duration of node |

For reference, the function that governs look-at behavior, can be found under: All > Plugins > CharismaPlugNPlayContent > Blueprint > Metadata > BP_SetLookAtFunction
NOTE: Every object that is part of the Charisma system in the SDK can be targeted; Every actor that has
UCharismaEntityComponentcomponent attached, with a valid ID, is part of the Charisma system.
Object interact controls
The Plug 'n' Play SDK allows you to create interactable objects that affect story graphs in Charisma. Out of the box, the Plug 'n' Play also supports allowing/blocking interactions with interactables in the scene.
The Plug 'n' Play comes with 3 interactables in the sample scene - a telescope, a book, and a coffee cup. Play through the story and see how your interactions affect the Charisma graph.
Creating new interactables
Let's create a new interactable, and test out the allow/block interact functionality.
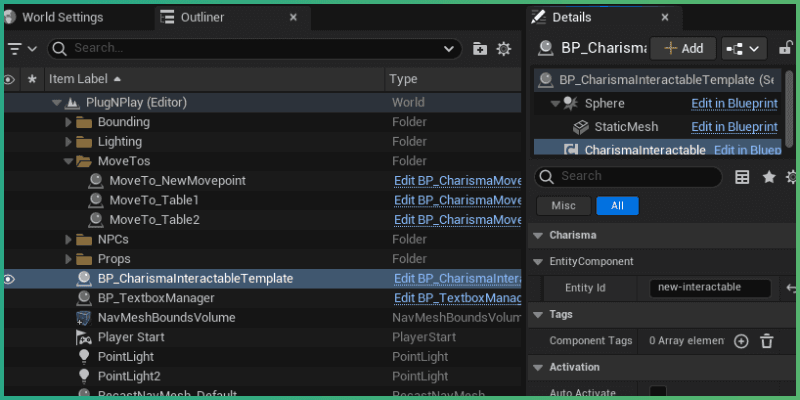
First, drag interactable template blueprint into the scene. This blueprint can be found under All > Plugins > CharismaPlugNPlayContent > Blueprint > Actors > Entities > BP_CharismaInteractableTemplate
Then, select your newly added interactable, and select the CharismaInteractable component in the Details panel. Set a unique EntityId for the object - this will be the name of the object with which you'll reference it on the graph.
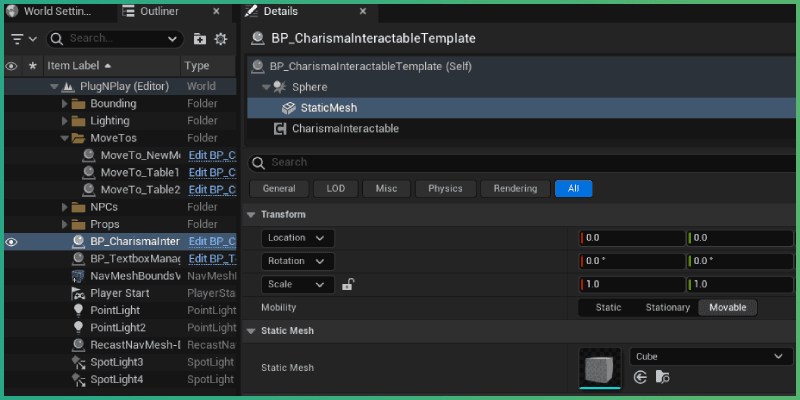
This blueprint includes a static mesh component, which you will need to assign with a 3D model of your choice. For this tutorial, we will assign a cube to the StaticMesh.
The default behavior for interactable objects in our SDK is that objects are interactable when a playthrough begins, and interactions are blocked after the player has interacted with an object. You can use the reset-interact metadata to reset an object interaction, to re-enable the interaction with the object.
In the graph, you can then add new metadata on a Node (opens in a new tab) to allow/block interactivity with your cube.
| Key | Value | Function of Metadata |
|---|---|---|
| block-interact | [interactable name list (comma separated)] | Prevents interactions with target object |
| allow-interact | [interactable name list (comma separated)] | Enables interactions with target object |
| reset-interact | [interactable name list (comma separated)] | Re-enables interactions with target object once interacted with |
Charisma graph routing based on interactions
If you want an object interaction to trigger a particular pathway in your Charisma graph, you can use an Action Node (opens in a new tab).
Add an Action Node at a point in the graph where you would like to divert to a different branch if the interaction has been triggered. In the text field of the Action Node, add the EntityId name that you have set on your interactable object.

Give it a playtest! Now, if you have triggered the particular action in a Unreal Engine playthrough, your graph will then divert through the Action node to your new branch.
The player
Default player behaviour, and static players
The Charisma SDK/PnP comes with a movable player as default, but you can make the player static if you prefer.
The player controller is set in World Settings panel, under Selected GameMode section. In this section, you can find our 2 key character blueprints - BP_CharismaPlayerCharacter and BP_CharismaPlayerController
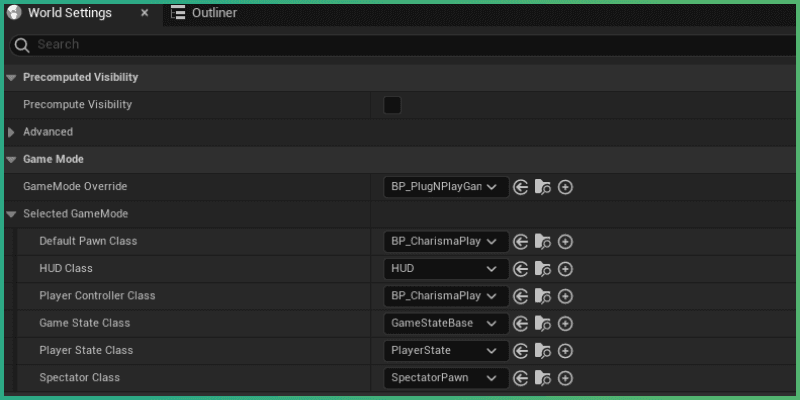
BP_CharismaPlayerCharacter is linked to the UI and movement controls. If you would like a static player, go into the blueprint, and remove or disconnect the movement control section within the EventGraph
Speech-To-Text
The primary way of interacting with Charisma, is through language. In our Plug 'n' Play SDK, we provide a way to communicate with Charisma through typing, as well as Speech-To-Text system, which work out of the box with our UI system (see UI blueprints under All > Plugins > CharismaPlugNPlayContent > UI)
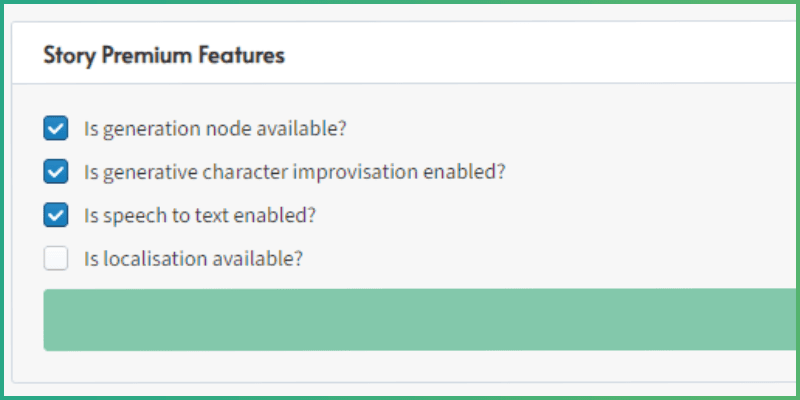
If you would like to make use of speech to text, make sure to enable speech to text in your Charisma Pro Story, under 'Story Premium Features'.
Furthermore, you'll also need to do some quick configuration in Unreal to detect speech input with your microphone.
Find your project folder, and navigate to the engine defaults config, under: PROJECT > Config > DefaultEngine.ini. Then, add this code at the end of the configuration file, and save:
[Voice]
bEnabled=true


[SystemSettings]
voice.SilenceDetectionThreshold=-1
voice.MicNoiseGateThreshold=-1


[OnlineSubsystem]
bHasVoiceEnabled=true
UI controls
UI widgets and functionality
Plug 'n' Play SDK provides a template UI that handles text and speech input, character dialogue bubbles, and a story restart screen fader.
To find the UI elements in the PnP, you can find them under All > Plugins > CharismaPlugNPlayContent > UI

-
W_PLayerReplyUIis referenced by theBP_CharismaPlayerCharacterandBP_CharismaPlayerControllerblueprints mentioned in the previous section. -
W_Textboxis handled by theBP_TextboxManager, which is placed in the world and collates any NPCs that have a textbox, and controls their speech bubbles.
You can modify any aspect of the PnP to fit your project needs. For example, if you would like to disable speech bubbles in your project, you can simply remove the BP_TextboxManager from the sample level.
Player input interaction points
To add interaction points and allow player to speak, you can use the set-player-speak metadata function.
| Key | Value | Function of Metadata |
|---|---|---|
| set-player-speak | [no value required] | Brings up reply UI to allow player to speak or type a message |
This metadata prepares and enables the input text/speech input UI, so that player can send a response to Charisma. Once player submits a response, the UI automatically disappears and no further actions are needed - the response gets sent to Charisma!

Story end
To show the story end screen, you can toggle the End Story button on the final node in a Charisma graph. Now, once you reach that node in the graph, the Plug 'n' Play will show a story end screen which prompts the user to press "R" to restart the story from the beginning.


Custom animations (Simple)
Triggering animations manually
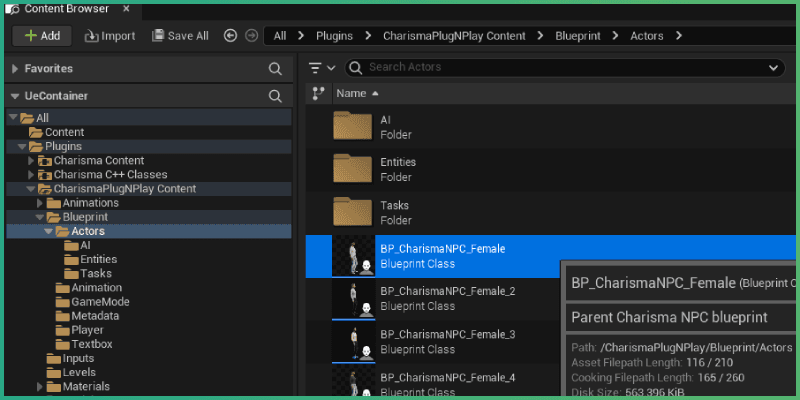
If you want to trigger an animation to play at a specific moment in your story, you will need to set it up as a custom animation. To begin, navigate to:
All > Plugins > CharismaPlugNPLayContent > Blueprint > Actors > BP_CharismaNPC_Female
NOTE:
BP_CharismaNPC_Femaleis the main character blueprint - the other ones are simply data-only overrides which inherit from it.
Once open, select Class Defaults, and find Custom Anims list in the Details panel (it should be under 'Animation').
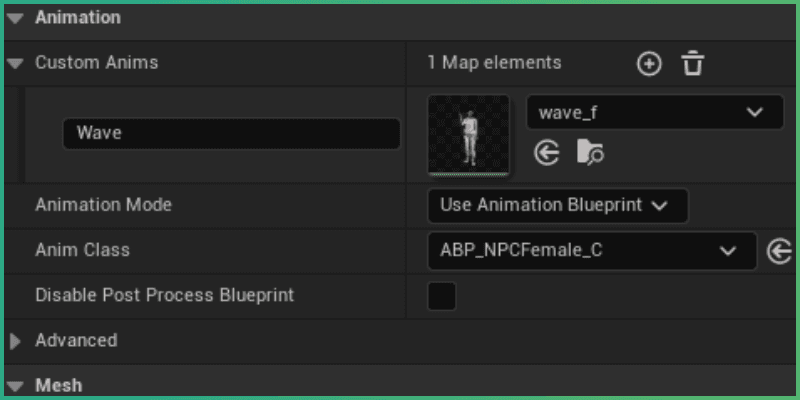
In order to play a specific custom animation, you will need to add this animation to the Custom Anims list, and give it a nice readable name. The name will be used in Charisma metadata manager to send data on the animation that will be triggered.
The Plug 'n' Play comes with a set of different animations for both the male and female NPCs. You can put those in the Custom Anims list if you would like to trigger them at a certain point.
Playing the custom animation
You can force the animation to play when you hit a specific node in a graph, by attaching metadata to a Character node (opens in a new tab).
For example: you can attach metadata: [play-animation | ashby,mannerism_armstretch_F] to play the mannerism_armstretch_F custom animation attached to a character.
| Key | Value | Function of Metadata |
|---|---|---|
| play-animation | [character name],[animation name] | Plays the specified animation on the target character |

If everything was set up correctly, when you hit the node in the graph, metadata will be sent to the SDK that triggers the custom animation to play on the specified character.
Custom animations (Advanced)
Full animation system overview
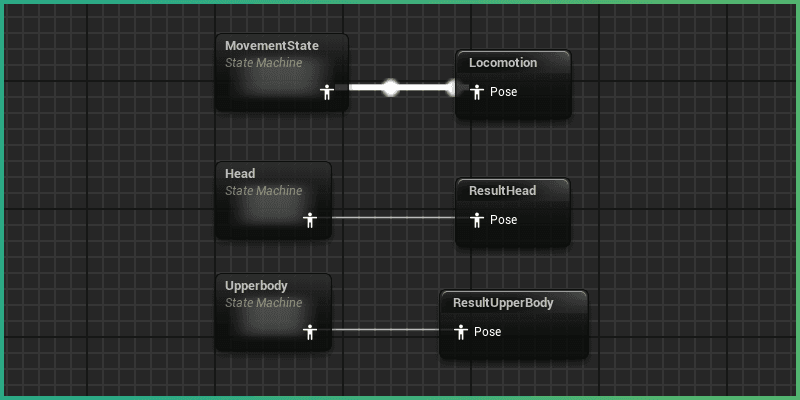
For animations, we leverage Unreal’s Animation Blueprint and suite of animation features. This allows us to create comprehensive animation state machines, with multiple layers and levels of control. To get started, open up the main Animation blueprint found in:
All > Plugins > CharismaPlugNPLayContent > Blueprint > Actors > BP_CharismaNPC_Female
As in our Unity implementation, the NPCFemale acts as the main animation controller with the Male variant simply replacing animations with male counterparts. The Animation Blueprint event graph is broken down into 3 key state machines which are then composited together depending on parameters. These are:
- MovementState/Locomotion - Fullbody state machine, mainly focused on Idle, Turning and Walking animations – managing the current movement state of the NPC.
- Head - Head-only state machine, used for talking animations and also head tracking.
- Upperbody - Upperbody-only state machine, used for talking animations.
In this section, we’ll go over the alternative process of adding new animations to the existing state machines. For running custom animations via the “play-animation” metadata function, please refer to the Unreal tutorial video.
Adding an animation to existing state
Once you have your animation and know which layer it suits best, start by opening that layer’s state machine. In our example case, we will be adding a fullbody “Wave” animation, which we’ll place in the MovementState state machine. This should only be used as an example, and implementation may vary depending on the requirements of the animation.
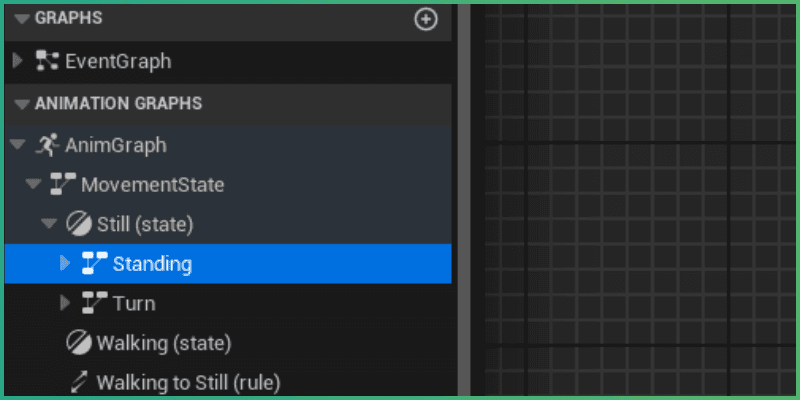
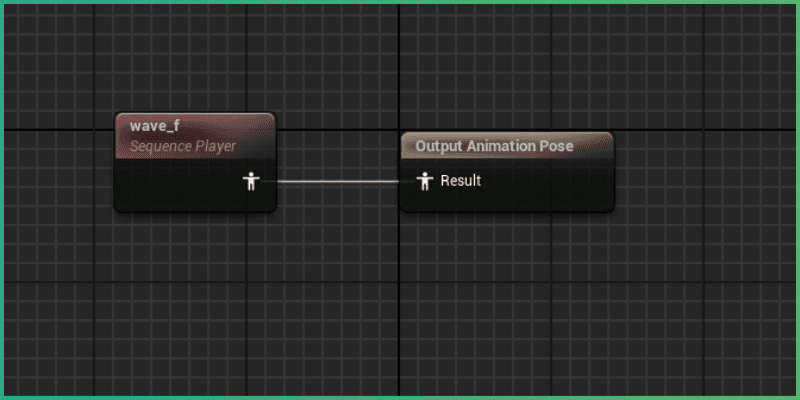
Inside the Standing state machine, we’ll find three key states: Idle, Mannerism and Talking. As our Wave animation will only play under certain circumstances, make sure to add a new State named Wave by Right Clicking > Add New State.
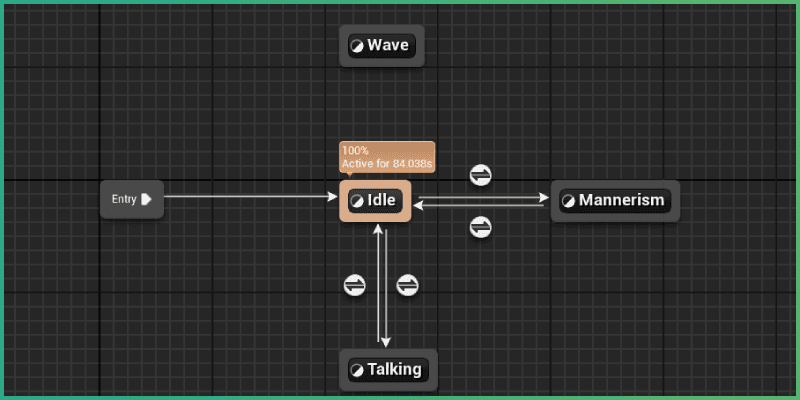
Inside the Wave state, we can hook up the existing Wave_f animation clip. The implementation inside your newly added state may require more involved sequences. Please review some of the other existing states for examples of randomly assigned animations and more complex blending.
With the Wave state set up, we can connect it to Idle via a conduit. Drag from the Wave state box into the Idle state box and vice versa to create a two-way connection.
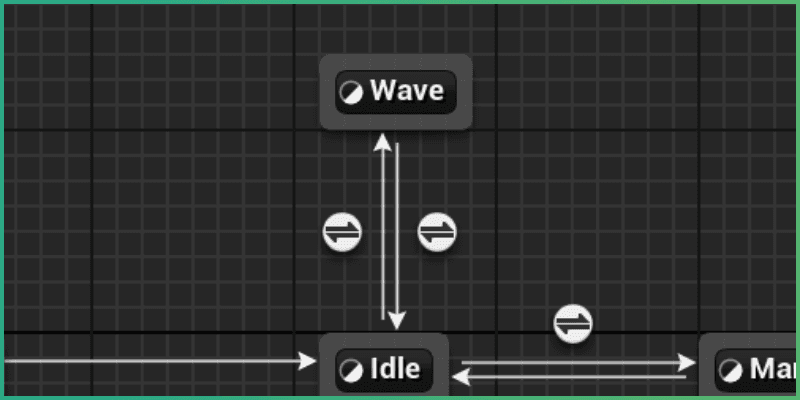
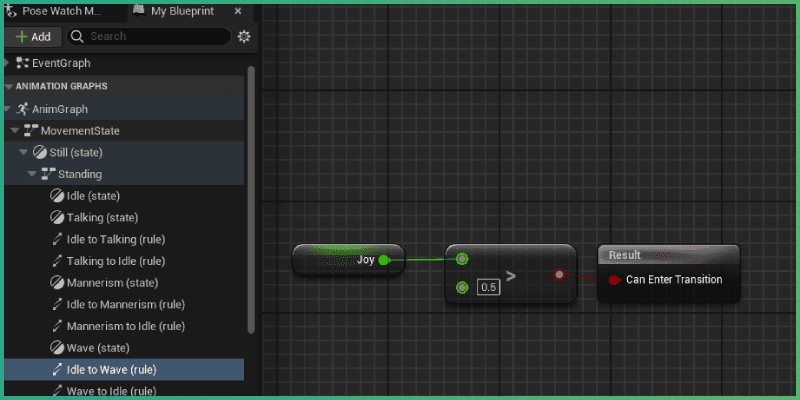
From here, the newly created transitions can have conditions added for when the state should change. In our case, we will play the Wave animation when a Joy emotion is detected with an intensity of over 0.5. The same should be done for exiting the state, but in reverse, when the Joy emotion subsides. In this particular case, the "Joy" field itself is a parameter set up in the AnimationBlueprint.
From here, the new Wave animation is successfully added. These principles can be re-used for other animations depending on their requirements. We also recommend adding new parameters to the blueprint to facilitate any custom behavior that isn’t already supported.
Custom metadata
Adding new metadata functions
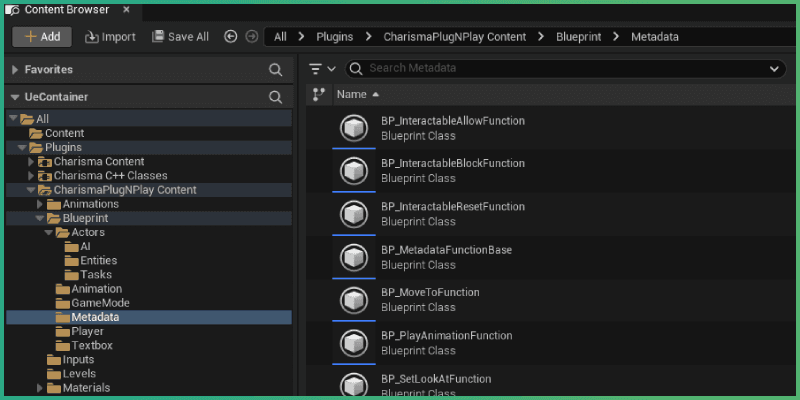
For adding new metadata functions, please refer to the Unreal Plug-n-Play Content folder under:
All > Plugins > CharismaPlugNPlay Content > Blueprint > Metadata
Inside, you can find several Blueprints for supporting various Metadata functions. These all inherit from the base Blueprint BP_MetadataFunction
To add your own Metadata function, create a new Blueprint in your preferred location (Right Click in Content Browser > Blueprint > Blueprint Class) and set your Parent class to BP_MetadataFunction.

To start interpreting your own metadata entries in the Charisma story, you will need to update your new MetadataFunction.
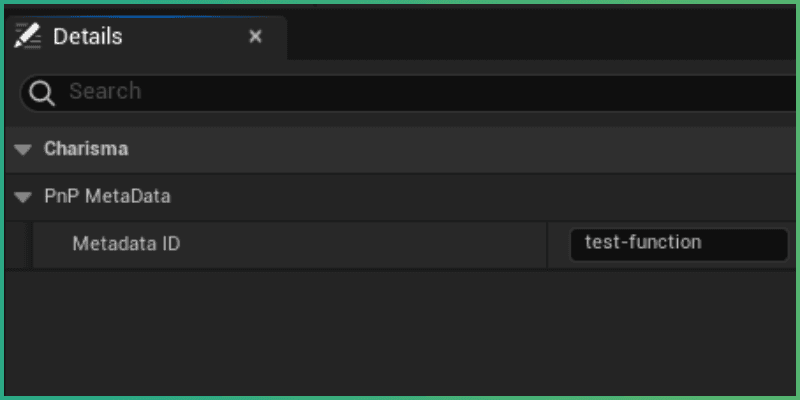
Open your new Blueprint. Under Class Defaults, find PnP MetaData section, and expand. You will need to set the Metadata ID. This is the Key field for a Metadata entry.
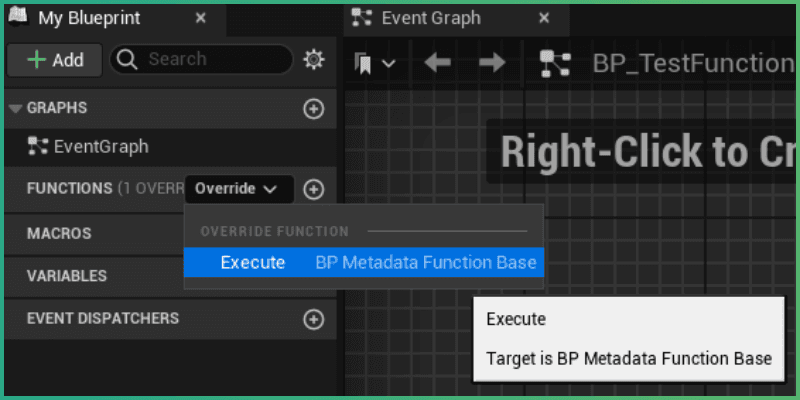
Once the Metadata ID is set, you will need to Override the base class named Execute. To do this, hover over the Functions section in the Blueprint and click the Override dropdown. Select the Execute Function.
Once the Execute function is overridden, you can set up this function to your own specifications. You can reference the PlaythroughData input structure for any objects you want to affect within the world, and MetaData structure to decide how to execute the function based on received data.

Referencing metadata functions
Lastly, with the MetadataFunction blueprint created and fully set up, you will need to add it to the existing BP_PlugNPlayGameMode in order to be parsed when the Playthrough sends a message.
Open All > Plugins > CharismaPlugNPlayContent > Blueprints > Game Mode > BP_PlugNPlayGameModeTemplate
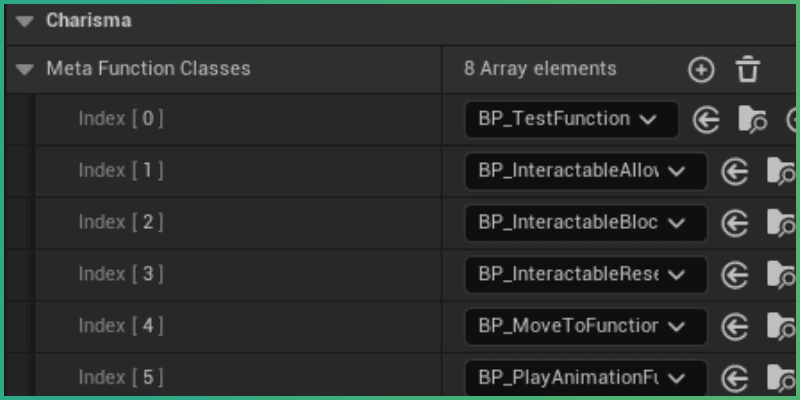
Open Class Defaults, and in the Details panel, find the Charisma section. You need to add your newly created MetadataFunction into the Meta Function Classes list.
Now, whenever you send metadata from Charisma, the SDK will look for a function with the matching MetadataID key field, and then it will run the Execute function on it.
Troubleshooting
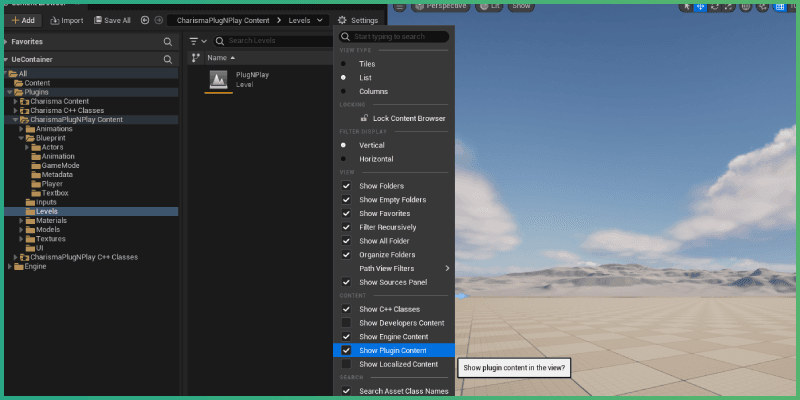
Q: I cannot see the Plugins content in the Content Browser
If you cannot see Plugin folders in UE, you should click on Settings in the Content Browser, and select Show Plugin Content
Q: The game is not detecting my microphone input
You need to modify your DefaultEngine.ini file, within your project folder. Find your project folder, and navigate to the engine defaults config, under: PROJECT > Config > DefaultEngine.ini. Then, add this code at the end of the configuration file, and save:
[Voice]
bEnabled=true


[SystemSettings]
voice.SilenceDetectionThreshold=-1
voice.MicNoiseGateThreshold=-1


[OnlineSubsystem]
bHasVoiceEnabled=true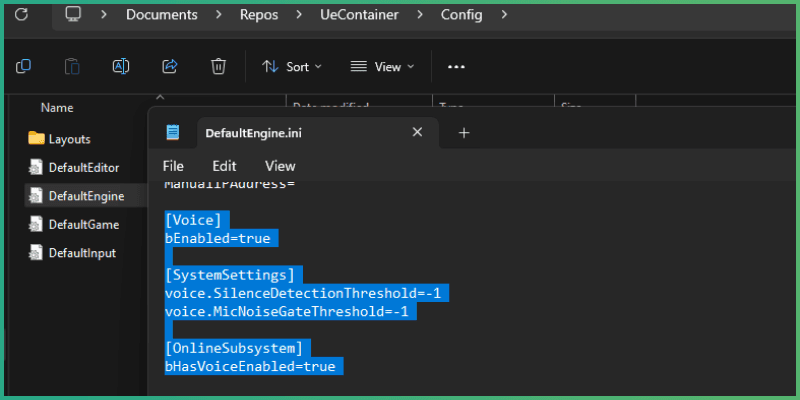
Q: My project won't compile or package
There's a multitude of reasons for why a project won't compile depending on the engine version, target platform, etc. Luckily, most of compile issues are relatively easy to sort out.
We have outlined the most common issues and their fixes in our GitHub repositories. Check them out:
Charisma Unreal Engine SDK (opens in a new tab)
Charisma Unreal Engine Plug 'n' Play SDK (opens in a new tab)
Q: I have a different issue
If you have a query that above sections don't answer, send a message from our website (opens in a new tab), or get in touch directly through our Discord (opens in a new tab)
List of metadata included
Metadata function list
Charisma’s Plug ‘n’ Play SDK comes with a number of basic metadata instructions that are ready to work out of the box. As soon as your Charisma story and characters are connected to our Plug ‘n’ Play sample project and 3D avatars, the metadata instructions in the table below will trigger the specified events in your project. Simply add the required piece of metadata to the Metadata Manager on a Charisma Character node (opens in a new tab) in your story graph – the Key in the left field and the Value, where required, in the right field.
| Key | Value | Function of Metadata |
|---|---|---|
| set-player-speak | [no value required] | Brings up reply UI to allow player to speak or type a message |
| set-look-at | [character name], [look at target] | Makes specified character look at a target for duration of node |
| play-animation | [character name], [animation name] | Plays the specified animation on the target character |
| move-to | [character name], [move to target] | Makes specified character walk to target waypoint |
| block-interact | [interactable names] (comma separated) | Prevents interactions with target object |
| allow-interact | [interactable names] (comma separated) | Enables interactions with target object |
| reset-interact | [interactable names] (comma separated)> | Re-enables interactions with target object once interacted with |